

Embark on a delightful journey into the world of homemade chocolate making, a skill that complements the art of crafting the best chocolate cakes in Gurgaon. At Gurgaon Bakers, while we take pride in our exquisite range of chocolate cakes, we also cherish the joy and creativity of making chocolate from scratch. Whether you’re an aspiring baker or a chocolate enthusiast, mastering the art of chocolate making can add a special touch to your baking repertoire, especially when it comes to creating indulgent chocolate cakes
The process of making chocolate at home is not just a culinary activity; it’s an artistic expression. It gives you the liberty to infuse personal flair into every batch, creating unique tastes and textures that enhance the quality of homemade chocolate cake recipes. Imagine the satisfaction of baking a chocolate cake with chocolate that you’ve crafted with your own hands, using ingredients you’ve carefully selected for their quality and flavor.
For those in the Gurgaon area looking to elevate their baking skills, learning the basics of homemade chocolate making is a step towards creating the best chocolate cakes in Gurgaon. You gain control over every aspect of your chocolate, from the type of cocoa beans to the sweetness level, ensuring a healthier and more personalized baking experience. This customization is what sets artisan chocolate cake baking apart, allowing you to experiment with innovative flavors and designs that truly stand out.
So, whether you’re aiming to impress with your baking skills or simply exploring a delicious hobby, the art of making chocolate at home is an enriching addition to your culinary journey. Let’s dive into this sweet adventure, and bring the expertise of Gurgaon Bakers into your home with every melt-in-your-mouth creation!

Preparing Your Chocolate Making Workspace
Equipment Needed:
Before diving into the art of chocolate making, it’s essential to gather the right tools. Here’s a list of basic equipment you’ll need to start your chocolate crafting journey:
1.Chocolate Melter or Double Boiler: A must-have for gently melting chocolate without burning it.
2. Digital Thermometer: Precision is key in chocolate making, and a reliable thermometer ensures your chocolate is tempered at the right temperature.
3. Chocolate Molds: Available in various shapes and sizes, these molds help you create professional-looking chocolates.
4. Spatula and Whisks: Essential for stirring and ensuring your chocolate mixture is smooth and lump-free.
5. Bench Scraper: Ideal for chopping chocolate blocks and scraping chocolate off surfaces.
6. Marble Slab: If you’re tempering chocolate the traditional way, a marble slab is great for cooling the chocolate.
7. Piping Bags and Tips: For intricate designs or filling molded chocolates.
8. Quality Ingredients: High-quality cocoa beans or cocoa powder, cocoa butter, and your choice of sweeteners and flavors.
Setting up Your Space:
Creating an organized and efficient workspace is vital for a successful chocolate making experience. Here are some tips to set up your chocolate making area:
- Cleanliness First: Ensure your workspace is clean and dry. Chocolate is sensitive to odors and moisture, so it’s crucial to keep your area tidy.
- Organize Your Tools: Arrange your tools and ingredients for easy access. This not only saves time but also makes the process more enjoyable.
- Temperature Control: Chocolate is temperature-sensitive. Try to work in a cooler part of your kitchen, away from direct sunlight or heat sources.
- Prep in Advance: Measure out all your ingredients and have them ready before you start. This is especially important when working with chocolate, as you need to work quickly once it’s melted.
- Safety First: If you’re using a double boiler, be cautious of steam burns. Also, ensure that any electrical equipment is safely set up and away from water sources.
With your tools ready and workspace set, you’re all set to embark on the delightful process of chocolate making. Remember, good preparation is the foundation of great chocolate!

The Chocolate Making Process
Step 1: Roasting and Grinding Cocoa Beans
- If you’re starting from scratch, begin by roasting high-quality cocoa beans. This enhances their flavor and aroma.
- Once roasted, let them cool and then grind them into a fine paste. This is the base of your chocolate.
Step 2: Melting Chocolate
- For those using pre-made chocolate, start by finely chopping the chocolate for even melting.
- Gently melt the chocolate using a double boiler or a chocolate melter, stirring frequently to avoid any hot spots that can burn the chocolate.
Step 3: The Importance of Tempering Chocolate
- Tempering is crucial for achieving the perfect texture and shine in your chocolate. It involves heating and cooling the chocolate to specific temperatures.
- The science behind it lies in stabilizing the cocoa butter crystals, which gives chocolate a smooth, glossy finish and a satisfying snap.
- Heat the chocolate to around 45°C, then cool it to 27°C, and finally reheat it to 31°C (for dark chocolate; temperatures vary slightly for milk and white chocolate).
- Use a digital thermometer to monitor the temperature precisely.
- Tips for success: Be patient and maintain control over the temperature. Even a small mistake can lead to a grainy texture.
Step 4: Flavoring and Customization
- Once your chocolate is tempered, it’s time to get creative with flavors and inclusions.
- You can add a variety of flavors like vanilla, orange zest, or even chili for a kick.
- For inclusions, consider nuts, dried fruits, or even sea salt. Make sure any additions are dry and at room temperature to maintain the chocolate’s texture.
- Gently fold these into your tempered chocolate for an even distribution.
The process of making chocolate from bean to bar, or even starting with pre-made chocolate, is both an art and a science. Each step requires careful attention, but the result is your very own handcrafted chocolate, ready for the next stage of molding and setting.

Molding and Setting the Chocolate
After mastering the art of tempering, the next exciting phase in chocolate making is molding and setting your chocolate to perfection.
- Choosing the Right Mold: Select high-quality molds that suit the shape and size of chocolates you desire. Silicone molds are great for beginners due to their flexibility and ease of use.
- Preparing the Molds: Before pouring, ensure your molds are clean and dry. Any moisture can affect the chocolate’s setting process.
- Smooth Pouring Technique: Pour the tempered chocolate into the molds. To ensure a smooth and even fill, gently tap the mold on the counter to release any air bubbles. This step is crucial for achieving a professional look.
- Removing Excess Chocolate: If you’re making hollow chocolates, pour out the excess chocolate after filling the molds, then scrape the top with a bench scraper for a clean edge.
Setting the Chocolate:
- Cooling: Allow the chocolate to set at room temperature. Avoid refrigerating unless the room is too warm, as sudden temperature changes can cause the chocolate to bloom (form a white coating).
- Patience is Key: Give your chocolates enough time to completely set, which can take several hours depending on the size and thickness.
- Unmolding: Once set, carefully remove the chocolates from the molds. If you’re using silicone molds, gently push the chocolate out.
- The Perfect Snap and Shine: Well-tempered and properly set chocolate should have a glossy finish and a satisfying snap when broken.
Troubleshooting Tips:
- If your chocolates appear dull or have white streaks, it’s likely an issue with tempering.
- If the chocolates stick to the mold, they may need more time to set, or the mold wasn’t properly prepared.
Remember, chocolate making is an art, and perfection comes with practice. Each batch you make will teach you something new. Enjoy the process and soon, you’ll be crafting chocolates with the perfect balance of taste, texture, and aesthetics, much like the artisanal creations at Gurgaon Bakers!

Creative Ideas and Advanced Techniques
Now that you have mastered the basics of chocolate making, it’s time to elevate your creations with some decorative flair and advanced techniques.
Decorating Your Chocolates:
- Cocoa Powder Designs: A simple yet elegant way to decorate. Use stencils to create patterns or dust cocoa powder lightly over your chocolates for a classic look.
- Chocolate Drizzles: Melt a contrasting color of chocolate and use a piping bag or a spoon to drizzle it over your chocolates. This technique adds both flavor and visual appeal.
- Edible Gold Leaf: For a touch of luxury, apply small pieces of edible gold leaf to your chocolates. It’s perfect for special occasions and adds a sophisticated finish.
Advanced Techniques:
- Filled Chocolates: Start by coating your molds with a layer of chocolate, let it set, then add your filling – it could be ganache, caramel, or even a fruit puree. Seal with another layer of chocolate and let it set.
- Chocolate Sculptures: This is where you can really showcase your creativity. Use tempered chocolate to create shapes and figures. It requires patience and practice, but the results can be stunning.
- Marbling and Layering: Combine different types of chocolate to create marbled effects or distinct layers. This not only looks impressive but also adds a variety of flavors.
- Texture Adding: Experiment with adding textures to your chocolates, like crunchy nuts, crispy rice, or even popping candy for a surprise element.
Remember, the world of chocolate making is full of endless possibilities. These advanced techniques will not only enhance the aesthetic appeal of your chocolates but also give you a chance to experiment with flavors and textures. Whether you are preparing for a special occasion or just exploring your passion for chocolate, these creative ideas and techniques will help you craft truly unique and delectable treats, much like the artisanal offerings at Gurgaon Bakers.
Packaging and Storage
Once you’ve crafted your beautiful chocolates, proper packaging and storage are key to maintaining their quality and extending their shelf life.
Packaging Homemade Chocolates:
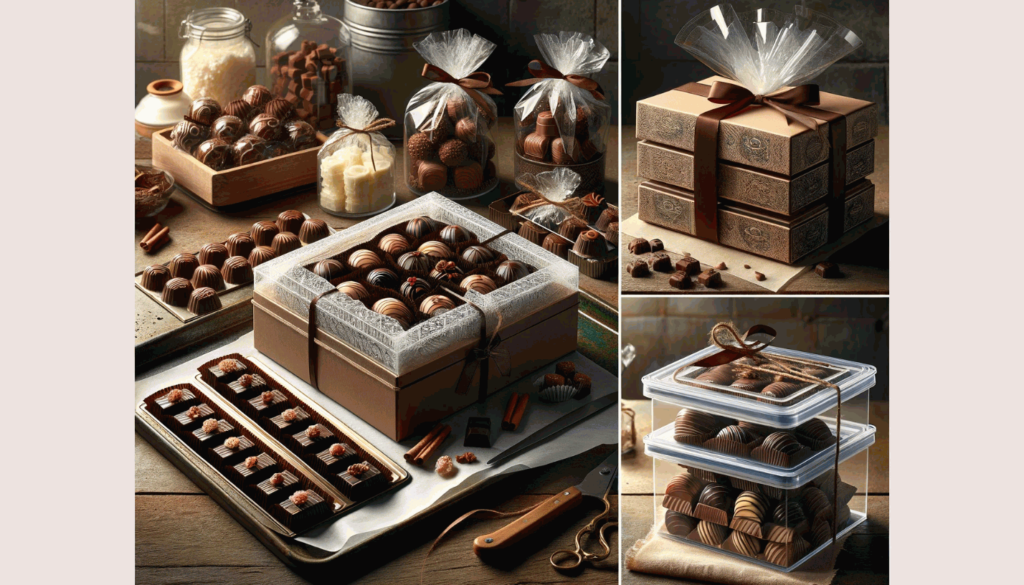
- For Gifts: When packaging chocolates as gifts, presentation is crucial. Use decorative boxes, cellophane wrap, or custom-designed wrappers. Consider the occasion and personalize the packaging accordingly. Add a ribbon or a custom label for a personal touch.
- For Storage: If you’re storing chocolates for personal use, opt for airtight containers to keep them fresh. Separate different flavors to prevent them from blending. Use parchment paper to layer the chocolates and keep them from sticking to each other.
Best Practices for Storing Chocolate:
- Ideal Temperature: Store chocolates in a cool, dry place where the temperature is consistent, ideally between 15°C and 18°C. Avoid refrigeration unless necessary, as it can cause condensation and sugar bloom.
- Away from Light and Odor: Keep your chocolates away from direct sunlight and strong odors. Chocolate can absorb smells, which can alter its flavor.
- Humidity Control: Ensure the storage area is not too humid. Excess moisture can lead to chocolate bloom, where sugar or fat rises to the surface, creating a white coating.
- Shelf Life: Dark chocolate can last up to two years if stored properly, while milk and white chocolates have a shorter shelf life due to their dairy content.
- Observing Changes: Regularly check your stored chocolates for any changes in appearance or aroma, which can indicate that they are past their prime.
By following these tips for packaging and storage, your homemade chocolates will not only look and taste great when you’re ready to enjoy or gift them, but they’ll also stay fresh longer. Remember, the effort you put into preserving your chocolates reflects the care and love you put into making them, much like the attention to detail at Gurgaon Bakers.
Congratulations on embarking on this sweet journey of homemade chocolate making! We hope this guide has inspired you to experiment with different flavors, techniques, and styles. Remember, each batch of chocolate is a new opportunity to express your creativity and refine your skills. Don’t worry about getting everything perfect on the first try; the beauty of chocolate making lies in the joy of the process and the delicious discoveries along the way.
We would love to see your chocolate creations and hear about your experiences. Share your masterpieces with us and the baking community! Whether it’s a batch of glossy truffles, a unique chocolate sculpture, or a beautifully decorated chocolate cake, your creations are a testament to your passion and dedication.
Visit us at www.gurgaonbakers.com for more inspiration, tips, and a peek into our own world of baking excellence. Let’s continue to spread the love and joy of baking, one chocolate at a time!
Happy Chocolate Making!


